At a glance: the Christmas jumper example
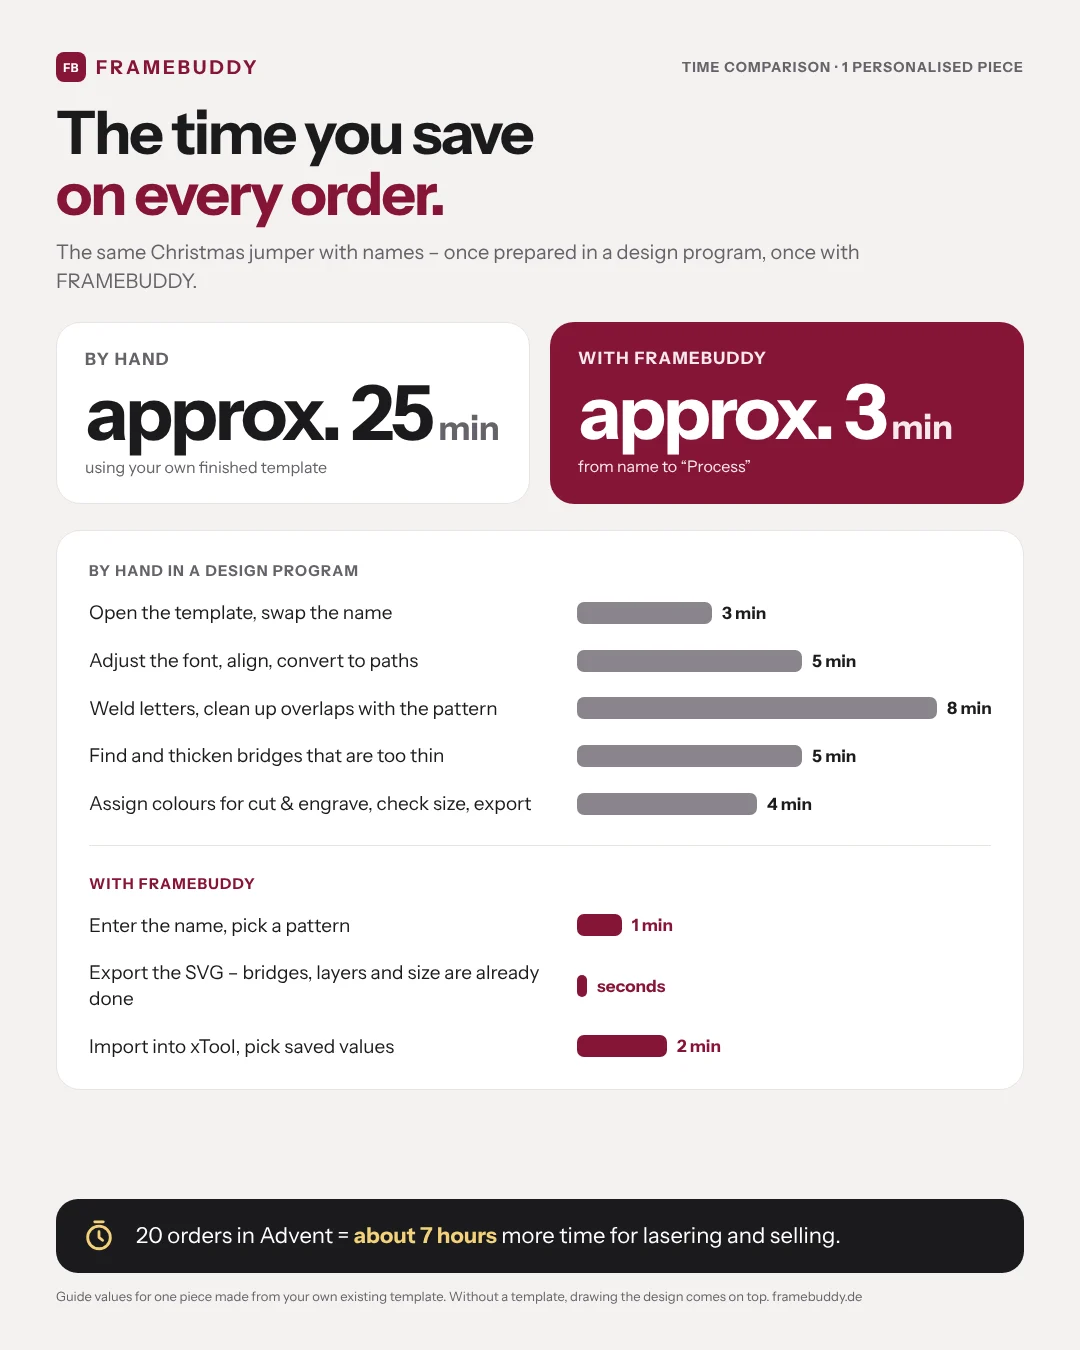
The pictures show the whole way on a real example – from the export in the generator to starting the laser (xTool F2 with blue light, poplar plywood). The file arrives ready: layers separated, size 1:1. All you do is set up the two layers.
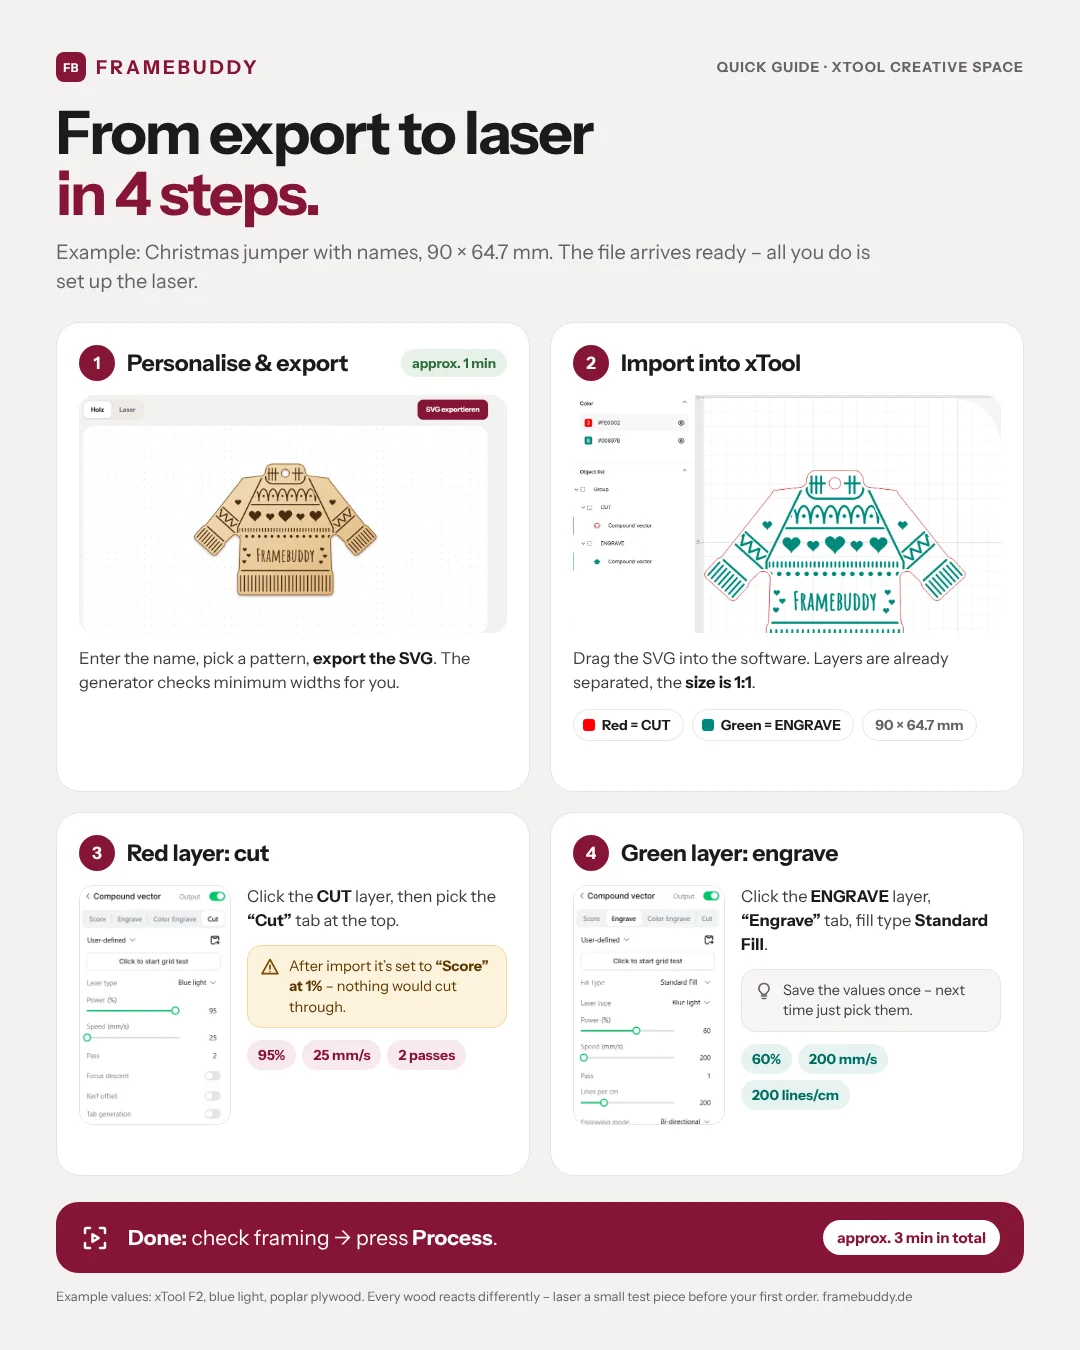
- Cut – red layer, “Cut” tab: 95% power, 25 mm/s, 2 passes.
- Engrave – green layer, “Engrave” tab, Standard Fill: 60% power, 200 mm/s, 1 pass, 200 lines/cm.
- Then check the framing and press “Process”.
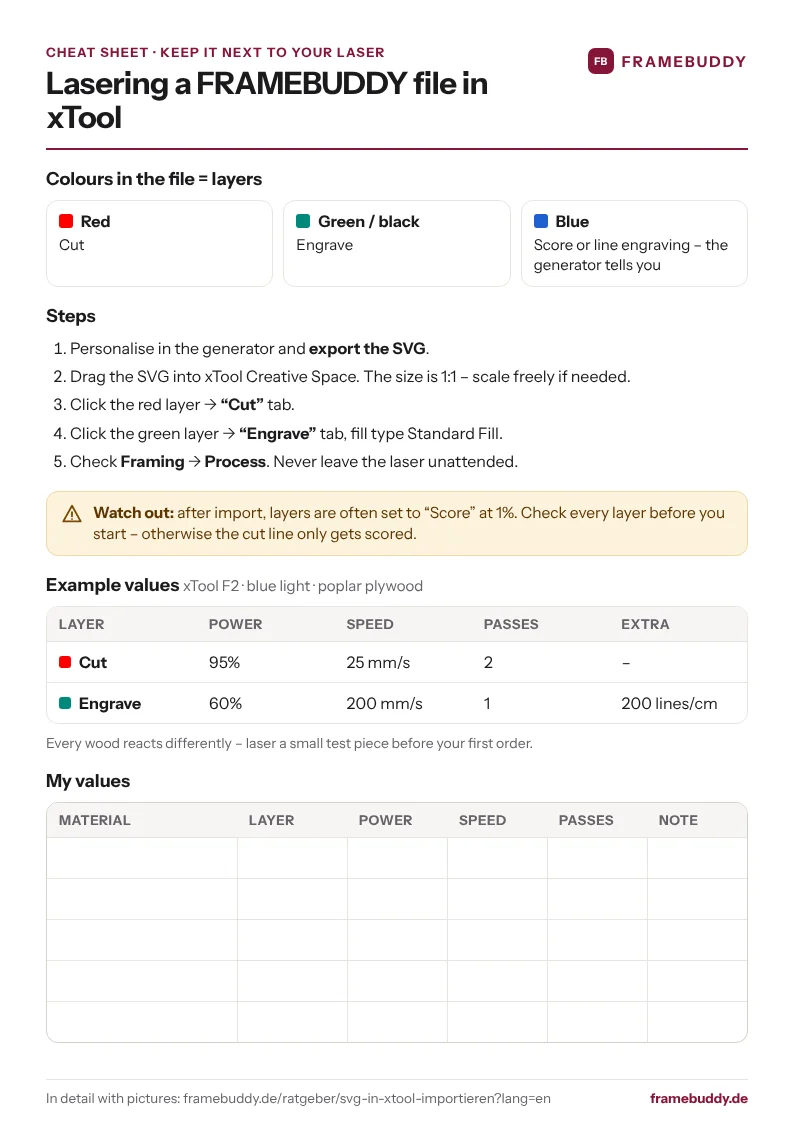
One A4 page to keep next to your laser: layer colours, steps, example values and a table for your own values.
Download cheat sheet (PDF)1. Import the file
- In xTool Creative Space, click “Image” in the left toolbar and select the SVG file. In xTool Studio the button is called “Upload”.
- The file appears on the canvas. All FRAMEBUDDY files are set up in real millimetres and contain only paths – fonts are already converted to outlines.
- Check the size: the width in the object settings must match the size in the generator. If it doesn’t, check the DPI setting for SVG imports in xTool Studio (72 or 96 are common) and import again. Then scale the design freely to whatever size you want.
2. Colours = layers
XCS creates layers based on line colour. Clicking a layer selects all objects in that colour. You then set the processing type yourself – XCS doesn’t take it from the file.
In FRAMEBUDDY files:
- Red = cut – in every generator.
- Green or black (filled areas) = engrave.
- Blue = depending on the generator, score, line engraving or holes. The generator tells you below the preview.
3. Assign the processing type
- Select the red layer → processing type “Cut”.
- Select the green or black layer → “Engrave”.
- Select the blue layer → “Score” (heart puzzle and crossword) or the setting the generator names.
- Set power, speed and passes for your material – ideally test on a scrap piece first.
4. Order and start
Engrave first, then cut. That way the piece can’t shift before all engraving is done. Never leave the laser unattended while it’s running.
FAQ
Why is my file too large or too small after importing?
Usually it’s the DPI setting for SVG imports. FRAMEBUDDY stores the size in millimetres; if it doesn’t match, check the DPI setting and import the file again.
XCS says it can’t process text.
That concerns SVG files with real text objects. FRAMEBUDDY files contain only paths – so you shouldn’t see this message.